3D Character Creation Series: Part 4, Character UV-Mapping, Substance Painter and Rendering.
Work In Progress / 12 January 2022
For timing, UV-Mapping took a day while Rendering and Texturing happens the following day (2 Days in total)
UV Mapping
After the retopo process is done, we moved on into UV-Mapping.
First of all, what is UV-Mapping:
"UV mapping is the 3D modeling process of projecting a 2D image onto a 3D model’s surface. The term “UV” refers to the bidimensional (2D) nature of the process
The 3D model is unfolded at the seams and laid out flat on a 2D plan, not unlike the process used for pattern-making in sewing. Once the mapping is complete, the artist can produce a custom image based on the “pattern” and apply it to the 3D model. This process makes it possible to produce models rich in color and detail. Other processes exist to color models, but they have much narrower limitations."
-Bruno Deschatelets
Basically disable the 3D models and flatten it into 2D so that its easier to paint eventually.
For this process, similar to retopology process, I try to look out for references which are relevant to my project.

As for the other article of clothing, look at the items I had on the wardrobe and see how they're being cut and sewn together and use it as a refrence.
For example, for her hat I am looking online on how one sewing a top hat and apply that on how I cut my UV parts for my model:
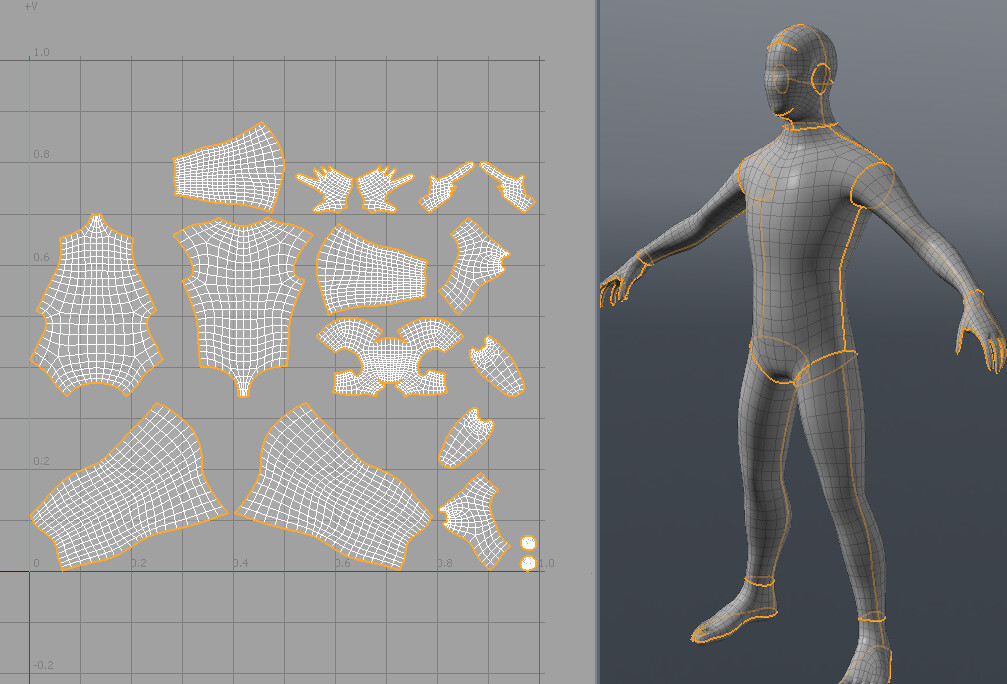
After references gathered, head on into Maya and have 2 panels of the window for both perspective view and UV editor view.
Select the whole retopologized mesh> Create> Camera-based, to project the mesh onto the UV panel.
like retopology section, select a mesh that you want to start working on and hide the rest.
Go to UV> 3D Cut and Sew UV.
Using the refrence gathered, select the lines to cut the 3D mesh accordingly.
When satisfied with all of the cuts, select the whole mesh > Right Click + Shift> Unfolded> Unfolded.
Now that everything is flatten into 2D, I want to make sure everything is in uniformed size minimized so that everything will fit into a box. The tool that might be useful for this is that go to UV Toolkit> Tools> Set up the desired number on the box depending how complicated and how much space you need for the whole mesh (preferably below 10)> Select the whole 2D faces> Set.
Now everything is minimized, I just need to place them on one box like a puzzle, making sure I use the space efficiently.
After everything is done, Import the High Poly FBX.
Make sure the retopo mesh and the high mesh are in the exact position.
Rename the low and high poly meshes the same same but put _low on the tail of the lower poly mesh and _high on the tail of the high poly mesh.
Export the low and the high meshes separately in FBX format.
Substance Painter
Go to Substance Painter, File> New> Select> Low Poly Mesh FBX file.
And then,
For baking high poly mesh into low poly mesh, go to Texture Set Setting> Baking.
These are my default setting for my baking. I occasionally tinkering with Max Frontal Distance and Max Rear Distance slider to make sure the baking process as nice as possible. If there is less detail on the model, 0.1 on both would suffice. If there are bunch of details, 0.025 would be alright.
Select materials that are relevant, select the brush tool. Do not forget to change the brush alignment into UV so that when I paint on top of the UV, it wont leak to the neighboring UV. I'll adjust the opacity of the Stroke opacity so that its easier to bend 2 colors together in a UV.
When everything is done, export the texture into a folder that I want these texture would be in.
Rendering
Going back to Maya, now I can put in texture on top of the low mesh that I messed around with earlier.
Select all low poly mesh > RIght Click + Assign New Material> Shader> aiStandardSurface.
Insert:
Base color: Base> Color> Insert _Base_color file> sRGB> Alpha is Luminance.
Metallic: Base> Metalness> Insert _Metallic file> Raw> Alpha is Luminance.
Roughness: Specular> Insert _Roughness file> Raw>Alpha is Luminance.
Nomals: Geometry> Bump Mapping> Tangent Normal> Insert _OpenGL file> Raw> Alpha is Luminance.
I use HDRI for the lighting. I use the exposure slider to adjust the light intensity. Visibility f the camera should be 0 so that the HDRI pictures wont appear on the rendering window.
Overall, most of my Issue is on baking. There is a research needed for me to perfecting it. some part of the body has this weird "stains" for some reason:
I do not know if its because the placement of the high mesh and the low mesh are not too align or is it in the fault of me for not cutting the UV properly.
I've also noticed that one of the nail is missing. perhaps thats the fault of the high poly is not being checked properly if the nail is visible enough when being sculpted or not or is it because of the retopo + UV are not properly executed so that the nail is not visible.
These are the things that should be researched in the future for a better quality of 3D Character modeling.